Saturday, August 31, 2013

Pachai Malli Chutney (Green Coriander Chutney)

Preparation time : 5 minutes     
Cooking time : Nil
Serves 4 
Difficulty :  Easy


This is a simple chutney which my grandma used to make it a side dish for idli/dosa. Please don’t get it confused with the green chutney we make for chat items. The term “Pachai” refers to raw i.e uncooked, no cooking or seasoning needed for this chutney.  The taste and flavor of the chutney which my grandma used to make those days still linger in my memories. The tangy and spicy taste of the chutney along with the fresh flavor of coriander,   mixed  with  cold pressed gingelly oil (செக்கு நல்லெண்ணெய் )  when eaten with soft, hot idlies!…..mmm… ok… let us go for the recipe. Now, this has become my family’s favourite chutney especially during rainy days.


Ingredients:
  • Coriander – 1 bunch
  • Small onion – 15 Nos.
  • Green chillies – 4 Nos.
  • Tamarind  - small piece
  • Salt to taste
  • Gingelly oil as needed.

Method:
Clean and wash coriander leaves in running water and chop it. Grind these leaves along with all the ingredients except gingelly oil. Transfer it to a bowl and drizzle gingelly oil over it and serve it as a side dish for idli/dosa. This can also be used as a spread for bread sandwich.

Note:
  1. Don’t add water while grinding chutney , water content in the onion itself is enough for getting  thuvaiyal consistency.
  2. Shallots (Small onion) suit best for this recipe. If you don’t have any, you can use big onion instead.


Read more ...

Wednesday, August 28, 2013

Red Aval Payasam (Red Poha Kheer)

Happy Krishna Jayanthi to all!

Krishna …. A character liked by all age groups, adorned worldwide and  linked with everybody’s life. Krishna is the eighth avatar of Lord Vishnu and  his birth is celebrated as Krishna Jayanthi/ Gokulashtami/ Janmashtami .

We all know Krishna is fond of butter, milk, sweets , aval and snacks like seedai, murukku etc. So it is a practice to offer these things  as “Nivedyam” on Krishna Jayanthi.

Today I prepared Red Aval Payasam as Gokulashtami Special. Very simple but delicious, healthy desert made with minimum ingredients.


Ingredinets:
  • Red aval – 1/2 cup
  • Milk – ½ litre
  • Jaggery              - ¾ cup
  • Grated Coconut – 2 tbsp
  • Cardamom powder – 1 tsp
  • Ghee – 1 to 2 tsp
  • Cashews -few

Method:

First roast cashews with few drops of ghee  until golden brown colour and keep it aside. In the same pan, roast  aval till you get a nice aroma, cool it and grind coarsely. Boil milk in a sauce pan, add the ground aval and cook for 5 minutes. In the mean time,  powder the jaggery, add a cup of water and melt it and filter the impurities. Add this jiggery syrup to the aval-milk mixture, bring it to a boil . then add coconut, cardamom powder , add the balance ghee and give a nice stir and switch off.
Aval payasam is ready to offer to Lord Krishna!

Note:
  1. You can use  raisins and other nuts as you wish.
  2. I used thick aval for this recipe. If you use thin aval (Silky Aval), then you need not even grind.
Read more ...

Tuesday, August 27, 2013

Mooli ka Paratha | Mooli Parantha| Stuffed Radish Paratha


Mooli Paratha or Radish Paratha is one of the  Punjabi special flat bread and it is very delicious , one could not notice even  the smell of radish. So it is an easier way to include this healthy vegetable in your diet in large quantities.  Kids will also love to have this for their lunch box. The health benefits of radish are many and here is  the recipe!


Ingredients:

   For Dough:
  • Wheat flour     - 1cup
  • Oil – 1 tsp
  • Salt & water  as needed

   For stuffing:                       
  • Grated radish   - 1cup
  • Jeera – 1tsp
  • Green chilli (finely chopped) – 1 or 2
  • Garam masala powder- ¼ tsp
  • Red chilli powder – ½ tsp
  • Coriander powder – 1 tsp
  • Turmeric powder - ¼ tsp
  • Amchur powder – 1 tsp
  • Coriander leaves (finely chopped) – 2 tbsp
  • Oil – 1 tsp
  • Oil/ghee to brush on parathas (optional)
  • Salt to taste

Method:

First prepare a soft, pliable dough with wheat flour, salt (only for roti), water and oil just like for chapathi/roti and keep it aside.

Pour oil in a kadai, add jeera to splutter, then add green chilli and all masala powders except amchur powder ( dry mango powder) and  give a stir for a minute. Now add the grated radish and sauté till all the water content from the radish evaporates. The mixture should become dry. Finally add amchur powder and required salt (only for stuffing) . Then add coriander, mix well so that the mixture gets blended evenly. Now the stuffing is ready. Allow it to cool for sometime.

Next make equal no. of small balls out of dough and stuffing. To make paratha, first take a dough ball, make it like a small bowl, keep the stuffing ball inside and cover the stuffing by extending the edges of the dough. Seal the stuffing with dough completely. Then dust this stuffed ball generously with maida and gently roll out like paratha using roller pin.

Heat  the tava, add the stuffed paratha, wait till the bubbles start to come on the surface, flip it to other side, then turn around and apply some oil or ghee on both sides and cook till brown spots appear on both sides. Yummy and soft Mooli ka Paratha is ready!

This paratha does not need a separate side dish since we use spices for the stuffing. So you can serve it with plain curd or any raita or tomato sauce. 

Tags: How to make mooli paratha, Parantha recipe with Radish, Stuffed Radish Paratha recipe, Diabetic recipes, How to make stuufed radish chapathi?, stuffed roti with radish
Read more ...

Sunday, August 25, 2013

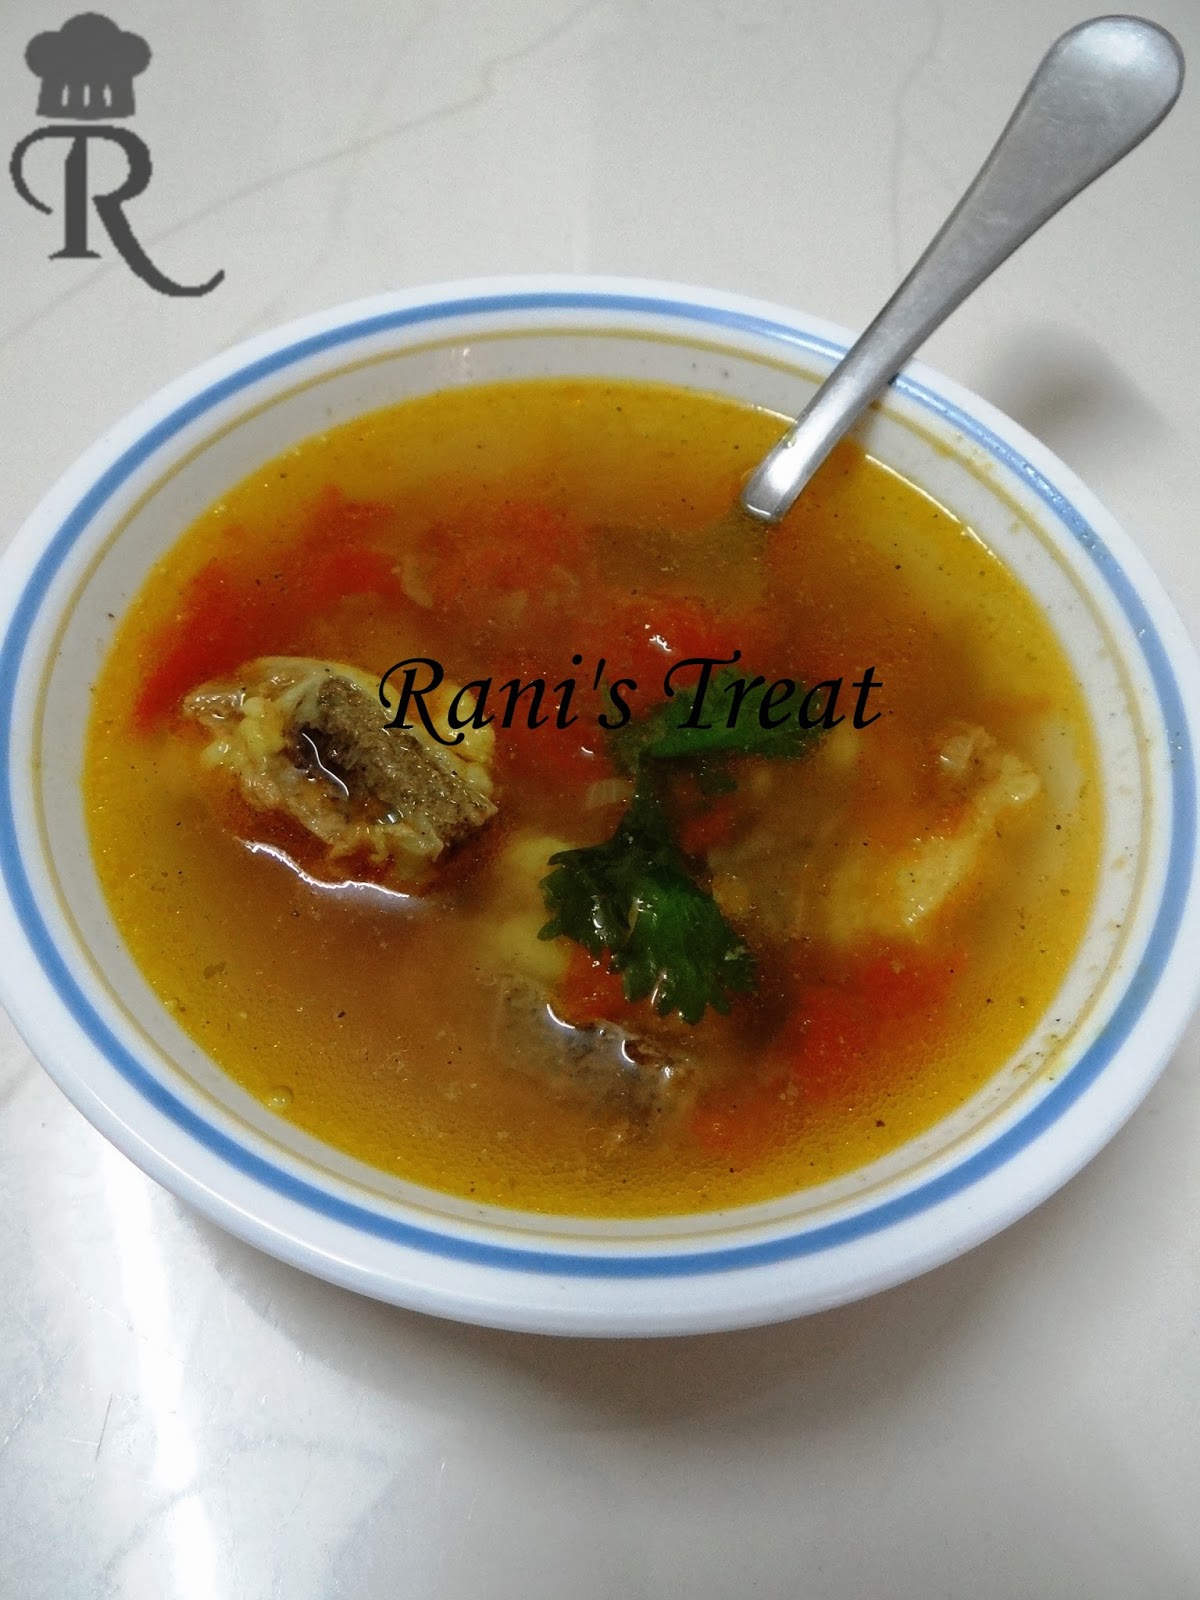
Mutton Bone Soup | Nenju Elumbu Soup (Nenjelumbu Soup) | Maarkandam Soup


Preparation time : 10 minutes     
Cooking time : 20 minutes
Serves 4 
Difficulty :  Easy

Mutton bone soup or Maarkandam Soup or Nenjelumbu soup is a clear soup, it is otherwise called "Nenju Elumbu Charu" and very good for all ages especially for growing children and very easy to make. I used to make this soup at least once in a month. I prefer this soup compared to broiler chicken . But today doctors, dieticians advice us not to take mutton. Children also like chicken and we don’t have any other choice than taking chicken. But the aroma of Country chicken soup  itself will tempt us to drink, that would be that much flavourful and healthy.

It was a practice in olden days to have this soup after taking oil bath on Saturdays. Nowadays, oil bath concept has faded away and  no one seems to apply oil on their scalps.  My grandma used to say that Nenjelumbu i.e bone from the chest portion of the goat does not have much fat and it is good for people suffering from cold and back pain , feeding mothers and those who are  recovering from illness/surgery.


Ingredients:
  • Mutton bone    - 250 gms
  • Toor  dhal        - 1 tbsp
  • Shallots – 10 Nos. or Big onion (finely  chopped)– 1 No.
  • Tomato            (finely chopped)         - 2 Nos.
  • Ginger – garlic paste  - 2 tbsp
  • Turmeric powder – 1 tsp
  • Coriander leaves ( finely chopped) – a handful
  • Pepper –Jeera powder – 1 tbsp
  • Salt as required
Method:
            Add cleaned  bone and dhal in a pressure cooker , add all the above ingredients along with 3 cups of water for about 10 minutes in slow fire. Leave the pressure to subside on its own so that the juice from the bone  gets extracted into the soup. Then open the pressure cooker, check for spice, salt and water. If you want more soup, then add some more water, pepper-jeera powder and salt accordingly. Bring it to one more boil , then switch off. Serve the soup hot with Mutton Kola Urundai!!


Tags: Markandam soup, Nenju elumbu soup, Nenju elumbu charu, Rib bone soup, goat rib bone soup, nenjelumbu charu, mutton bone soup, markandam pepper soup, elumbu soup, elumbu charu, mutton soup

Read more ...

Wednesday, August 21, 2013

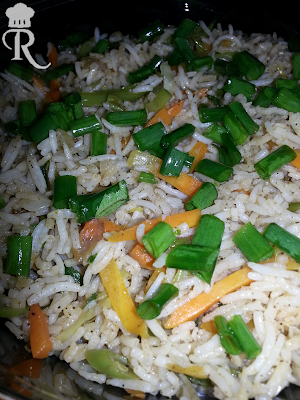
Vegetable Fried Rice

Preparation time :10 minutes     

Cooking time : 10 minutes

Serves 2 

Difficulty :  Easy

Whenever we go the restaurant, most of us order vegetable fried rice because it is a favourite dish for many. The restaurants serve the dish in different styles – some soak the dish in  oil, some serve with few strings of vegetable, some simply sauté the rice with salt and name it as fried rice, charging around Rs.180/- for the salted rice. Also, in restaurants, they will definitely add ajinomoto. There are  many controversial statements on the usage of ajinomoto.  I am not going to discuss on that issue but I can say if we prepare fried rice at home, these problems could be eliminated. Since it is easy to prepare, ideal for lunch box too, we can give it a try following the recipe. But the recipe depends mainly on the ingredients rather than preparation. Having the following ingredients on hand, go ahead with vegetable fried rice.


Ingredients:

  • Basmathi rice   - 1 cup
  • Garlic (very finely chopped)  - 6 pods
  • Capsicum         - ¼ cup
  • Carrot  - 1 No.
  • Beans   -  3 Nos.
  • Cabbage – 2 leaves
  • Spring onion  - 2 sprigs
  • Tomato sauce – 1 tbsp
  • Chilli sauce  - 1 tbsp
  • Pepper powder - 1 tbsp
  • Sugar   - ¼ tsp
  • Salt to taste
  • Oil  - 2 tbsp.

 Method:
Cook the basmathi rice with 1:2 water and salt. Spread the cooked rice in a flat bowl and drizzle some oil over  it so that it will not stick. Cut the vegetable into thin, long pieces , chop finely  the onion in the spring onion and keep it ready.  In a flat bottomed non stick pan, pour oil and add finely chopped garlic and sauté till you get nice aroma. Add onion, sauté a little, then add all vegetables along with a portion of finely chopped spring onion and sauté vegetables in high flame for 2 minutes. Then add sugar, salt required for vegetables and sauce, sauté well for 1 minute. Then add rice ,  pepper powder and the balance spring onion , gently mix rice with vegetables.  Check for salt and add if required. After all the vegetables get mixed with the rice evenly, switch off the stove. You can serve it with tomato sauce, any raita or veg/non-veg Manchurian.

Note:
As I told, fried rice is ingredient specific, capsicum &  spring onion is a must in this recipe.
Read more ...

Sunday, August 18, 2013

Simple Vanjaram Fish Fry (Seer Fish Fry)


Preparation time :10 minutes     
Cooking time : 10 minutes
Serves 2 
Difficulty :  Easy


           Vanjaram fish is always good for making fry than kuzhambu. There are many methods i.e masala for frying fish and each masala adds unique flavor and taste to fish fry. This is a very simple masala and made in a jiffy but it will not compromise on taste.


Ingredients:
  • Vanjaram or Seer Fish             - 4 pieces (sliced)
  • Red chilli powder        - 2 tbsp
  • Turmeric powder         - 1 tsp
  • Lemon juice                 - 1 tsp
  • Salt as required
  • Oil for shallow frying

Method:
            Wash fish thoroughly , then marinate the fish pieces with red chilli powder, Turmeric powder, lemon juice and salt for minimum 30 minutes. Then pour oil in a flat bottomed pan, after oil gets heated, place the marinated pieces  and shallow fry on both sides. Tasty fish fry is ready!

            This can be served with hot steaming rice with Manchatti Meen Kuzhambu (Fish Gravy), sambar, rasam, paruppu sadam(dhal rice),  keerai sadam etc.
Read more ...

Saturday, August 17, 2013

Oats Kolukattai

Preparation time :10 minutes     
Cooking time : 10 minutes
Serves 2
Difficulty :  Easy

               I am a big fan of kolukattai , likewise everyone in my family loves kolukattai. My grandma used to make so many varieties. In the same way , I also tried out so many kolukattais. One of the recipe is with Oats.  I’ll post the other kolukattai varieties also in due course. But I prefer this recipe to be blogged early because nowadays, oats has been included in the regular breakfast menu of many families. Due to its mushy nature, many of us don’t like oats. In the busy morning hours, we usually prepare porridge using oats but it could not be taken regularly as we have idli or dosa. Oats is good in reducing cholesterol but people with diabetes should not have it in liquid form . It has to be thick in consistency like “kali” so as to delay digestion. I bet elderly people will not like to have oats porridge as it is very bland.


             To overcome all the above , and to make the morning breakfast interesting, here comes the recipe for “Oats Kolukattai”. It can even be taken as healthy evening snack for children when they come back from school.


Ingredients:
  • Oats – 1cup
  • Green Chillies (finely chopped) – 1 No.
  • Grated coconut – 2 Tbsp
  • Curry leaves (finely chopped) – 2 Tbsp
  • Mustard seeds – 1 tsp
  • Urad dhal – 1 tsp
  • Asafoetida – a pinch
  • Oil – 1 tbsp
  • Salt as required
  • Water – 1/2 cup

 Method:
            First dry roast the oats in a kadai in slow fire for 5 minutes till you get nice aroma .  Keep it cool and then grind it coarsely in a mixie. Pour oil in a heavy bottomed kadai and season with mustard seeds, after it starts spluttering , add urad dhal, wait for dhal to turn golden yellow, then add  asafoetida, then add green chilly , curry leaves , coconut. Don’t sauté too much after adding these items. Now add water and required salt. Bring it to boil. Then add Oats powder and mix the flour with all the ingredients. Now the entire mixture will become like a ball. Switch off the stove and leave it to cool.
Applying gingelly oil on hand, knead the oats mixture evenly, take out a ball  and press it with your fingers as we do for “pidi kolukattai”. Place the kolukattais in idli plate and and steam  for 5 minutes.

The yummy “Oats Kolukattai” is ready!  If you serve  it with coconut chutney, that would be a great meal of the day. Try and make it once, I am sure your husband will spend sleepless nights like an Ad for “Horlicks Oats” till you make the next time!!!

Note :

Onion is optional, those who like the taste of onion may include along with green chilli.  I have prepared (in the image shown) without adding onion.
Read more ...

Thursday, August 15, 2013

Independence Day Special: Tri-colour Smoothie

August 15th – the Independence Day… A day that has to be remembered by everyone but is now just a mere holiday - a holiday on which most people seem to stick to their couches watching telecasts of newly released films. This is a sad turn of events. Even schools don’t seem to be functioning on this day – there is no flag hoisting. The sad part is, many schools don’t even have a flag pole for flag hoisting.

Back in the days, the Independence Day was not a mere holiday. It was a day of national pride. We used to go to the school early in the morning for flag hoisting. For this one-day event, we would start preparing at least a month before. Our PT teacher was the leading lady of the day and she would organize everything, from the march past to the bands and drills. We had practice sessions every day, with two periods in the evening being exclusively allotted for this practice. The day before, our PT teacher would instruct everybody to come in neat uniform and on time. She would end it with a warning telling us that if we were absent that day, we had to bring 20 rupees as fine the next day ("எல்லாரும் நீட்டா யுனிபார்ம்ல கரெக்ட் டைமுக்கு வரணும். நாளைக்கு  எவள் எல்லாம் வரலையோ 20 ரூபாய் பைன் கொண்டு வரணும்"). This warning always had its intended effect and thus, on the Independence Day, one could expect 100% attendance.

Some of us on the student council team (scouts, guides and council members) who were given extra responsibilities like tethering the flag, flower arrangement, distribution of chocolates, etc., had to arrive earlier at the school than others. The tasks these volunteers had to perform sound simple on paper. You may even ask what is so great about tethering the flag to the pole. Well then, listen closely… there is a secret to tying knots so that when the rope is pulled, the flag gets released in the right position. This we knew, thanks to Guides training. I did not appreciate this ‘secret’ until I saw the flag hoisted upside-down on TV.

Once all the students had assembled neatly in straight files, we would be given a small flag to pin onto our uniform. We would then await the arrival of the Chief Guest with time dragging much more slowly due to our excitement. After this long wait came the main events - the March-past, and the flag hoisting event. Following the cry of ‘Flag Salute!’ we would look up to the flag and salute it with reverence. Then came the Chief Guest’s speech and my most favorite part of the day - chocolate distribution. The one single chocolate we received was something we treasured.

After returning home, we would watch the parade at Red Fort on DD Channel along with our dad. Viewing this enthused us and created in us a fire to make the next year’s celebration even better. We also came to know about the importance of independence. The Channel would then telecast the movie ‘Gandhi’.  I cannot count the many times I’ve watched that movie.

 I’m sure reading all this brought back memories for many of you, of the times when the Independence Day was celebrated in full glory. That said, it is sad to see that the importance of the Independence Day has been dethroned. I feel that it is our job to educate our kids about the importance of Independence and raise them with a spirit of patriotism.

Happy Independence Day!!!


Being a food blogger , I wanted to share a recipe on this special day. For morning breakfast , I wanted to make something simple with the ingredients available at home, so I made a healthy drink which I dubbed the 'Tri-colour smoothie'. Here is the recipe.

Ingredients:
  • Banana      - 1 No.
  • Spinach            - 5 leaves
  • Vanilla Ice cream -  2 scoops
  • Carrot              - 2 Nos.
  • Honey              - 1 tsp
  • Milk as required

Method:
            Cut the banana and put it in a blender along with spinach and  whip it until both gets blended well by adding few drops of  milk. Peel the carrot and grate it in a fine grater. Mix the carrot gratings with honey. Take a glass, fill the bottom layer with green banana smoothie, middle layer with Vanilla ice cream and the top most layer with carrot.

            This tri colour smoothie will give you all the energy you want for the whole day. So this is an ideal breakfast for lazy holidays. Spinach when eaten raw gives all nutritional benefits from the greens.  Kids will love it because of this colourful combo , they won't identify that you have added greens in this smoothie. But this smoothie is big 'No… No….' for diabetics and those who are on diet.

Enjoy Independence Day with this Tri-colour Smoothie!!

Note:
            The sweetness of banana itself is enough for this, so i didn't add any extra sugar. If you want you can add little sugar while grinding banana and spinach.
Read more ...

Wednesday, August 14, 2013

Thatta Payaru Thanni Kuzhambu ( Karamani/ Cowpea Gravy)


Preparation time : 5 minutes     
Cooking time : 20 minutes
Serves 4 
Difficulty :  Easy

Thatta payir is otherwise known as Karamani  and  in English, it is called cow pea / black eyed beans. This legume is available in many varieties and colours. I have seen white coloured karamani in many of the departmental stores in Chennai. But in south Tamilnadu, we get brown coloured pulses available in various sizes. Generally Thatta payir has its unique flavor and taste but in my opinion, the small, brown variety tastes much better than any other variety. Whenever my sister goes to my hometown , she will bring a  load of this payaru and I’ll always have a stock in my freezer.


The health benefits of this  beans are many, rich in fibre and low in cholesterol, it is very good for diabetic people. Dieticians advice diabetics to include pulse in every day meal in any form since it has low glycemic index. If we eat sundal every day, it will be boring. I have seen that many in Chennai make only sundal out of pulses but in the Southern part of Tamilnadu, we make kuzhambu ( Gravy) using all payaru. I’ll blog other sundal kuzhambu recipes in due course.  This thatta payaru kuzhambu | Thatta Payir Kuzhambu  will be slightly thin and the combination of this with piping hot rice and appalam/vadam shares no equal and is especially good on rainy days.

Ingredients:
  • Thatta payaru  -150 gm
  • Small Onion(chopped)     - 5 to 6 Nos. or                                                                                         Big onion  (chopped)       - 1 No. (Medium size)
  • Garlic pods      - 5 Nos.
  • Green chilli(slitted) – 2 Nos.
  • Tomato                 - 1 No.
  • Coconut           - 1 tbsp           
  • Red chilli powder    - 2 tsp
  • Coriander powder  - 3 tsp
  • Turmeric powder    - a pinch
  • Tamarind                  - lemon size (soak in 100 ml of water)
  • Oil                   - 1 tbsp
  • Salt as required

For seasoning:
  • Fennel seeds   - 1 tsp
  • Curry leaves    - few

Method:
                Dry roast thatta payaru in a kadai till you get a nice aroma from it. Cool this and rinse with water . Pressure cook the pulse for 4 whistles with  one and a half cups of water. Pour oil in a kadai, season with fennel seeds, curry leaves, then add onion, garlic, green chilli, sauté well till you get a nice aroma. Then, add tomato and sauté till it gets mashed. Following this, add all masala powders , transfer the cooked thatta payaru to a kadai. Add required salt and bring it to boil. Then add tamarind water, allow it to boil once more. Then add coconut paste , wait for it to boil, then switch off the stove. The kuzhambu consistency should be medium, only then will it taste great with steamed rice. It will go well with soft idli and dosa as well.


Note:

            I include coconut in recipes because it will add some taste to the gravy. There is no harm in using little coconut in every day recipe. Care  should be taken  not to cook for a long time after adding coconut to any recipe.

Read more ...

Sunday, August 11, 2013

Chettinad Kari Varuval (Mutton Fry)

Preparation time : 15 minutes     
Cooking time : 30 minutes
Serves 4 
Difficulty :  Medium

Chettinad Kari Varuval is a tasty, spicy side dish . My son started eating mutton (goat meat) only after having tasted this dish. I am sure all mutton lovers will love this recipe. My mom used to make this varuval to finish off the rice if she had cooked the rice in excess. Because we would not know how much rice we ate with this varuval. I don’t know how many of you heard about “kadai sadam”. After finishing varuval, my mom used to mix rice in the left out masala in the kadai. I have no words to describe that taste, it was such a  heavenly taste !!  It is not only the food that tastes so great , it is the bond of love that adds the unique taste to that dish.
I have described so much about this dish. So watch out for the quantity you eat when you make this dish. Ok? 


Ingredients:
  • Mutton ( Boneless) – ¼ Kg.
  • Small Onion (finely chopped) – 20 Nos.
  • Ginger garlic paste – 1 Tbsp
  • Tomato (finely chopped) – 2 Nos. (medium size)      
  • Red chilli powder – 2 tsp
  • Coriander powder – 1 tsp
  • Turmeric powder – 1 tsp
  • Pepper Jeera powder – 2 tsp
  • Salt as required.
To grind:
  • Coconut – 1 tbsp
  • Khus khus- 1 tsp
  • Cashew   - 3 Nos.
For seasoning:
  • Bay leaf – 1 no.
  • Cinnamon – 1” piece
  • Kal paasi  - 1 piece
  • Elaichi – 1 No.
  • Clove – 1 No.
  • Fennel seeds – 1 tsp
  • Red chilli – 2 Nos.
  • Curry leaves – few
  • Gingelly Oil – 2 tbsp

Method:

Wash mutton thoroughly, cube it and pressure cook along with salt, turmeric powder and ½ cup water  for about 3 whistles and 5 minutes in simmer. Take a thick bottomed kadai, pour oil (preferably gingelly oil), season with items one by one given under seasoning. Add onion, fry till it becomes golden brown,  then add ginger-garlic paste, sauté till the raw smell leaves. Next add tomatoes , fry till it get mashed well, then add all masala powders, sauté till oil gets separated. Then transfer the contents from the pressure cooker, mix well, add required salt ( remember we add salt while cooking mutton), cover with the lid and cook for 5 minutes. Then add the coconut paste, now the gravy will start thickening, add pepper jeera powder,  stir now and then, till the gravy gets dried. Your kari varuval is ready!
This can be served with any rice with sambar, rasam, curd or with elumbu sambar and with chapathi or parotta. Finally, don’t miss  your kadai Sadam கடாய் சாதம்) with your family!!

Note: If you want  thick gravy to mix with rice or side dish for chapathi, you can add one more tomato and remove from stove little bit earlier.  Coconut paste is optional.

Read more ...

Elumbu Sambar/ Nenju Elumbu Kuzhambu (Bone Gravy)

Elumbu Sambar or Elumbu Kuzhambu with mutton chukka is a signature dish of our family and loved by everyone . My brothers are crazy for this combo . This combo works out really well for Sunday’s lunch, today being Sunday,  I made elumbu sambar using nenju elumbu with Chettinad Kari Varuval (Mutton Fry). I want to post this recipe immediately so that next Sunday, you may try it out,  enjoy and realize that what  I am telling is absolutely true.
Most of the people, now a days, don’t prefer mutton because of its fat content. Doctors also advice us to go in for lean meat. In my opinion, elders can have in limited quantities once in a while but growing children should be given mutton regularly instead of chicken. Mutton provides good quality protein, rich in iron and other nutrients essential for growing children. Let us see how we can make Elumbu Sambar.


Ingredients:
  • Rib bone (Nenju elumbu) & Nalli -1/4 Kg.
  • Drumstick – 1 No. (cut into pieces)
  • Toor dhal -50 gm
  • Onion (finely chopped) – 1 No. (medium size)
  • Ginger garlic paste – 1 Tbsp               
  • Tomato (finely chopped) – 2 Nos. (medium size)      
  • Red chilli powder – 2 tsp
  • Coriander powder – 4 tsp
  • Turmeric powder – 1 tsp
  • Tamarind  juice – 2tbsp
  • Salt as required.
To grind:
  • Coconut – 2 tbsp
  • Khus khus- 1 tsp
  • Pepper – 1 tsp
  • Jeera -  1 tsp

For seasoning:
  • Bay leaf – 1 No.
  • Cinnamon – 1” piece
  • Kal paasi  - 1 piece
  • Fennel seeds – 1 tsp
  • Red chilli – 2 Nos.
  • Curry leaves – few
  • Oil – 2 tbsp                                                                              
Method:
            After washing the bone thoroughly in water, put the bone in a pressure cooker along with washed toor dhal, turmeric powder, salt , 2 cups of water and cook for 3 whistles and simmer for 5 minutes. Now place the flat bottomed kadai, pour oil, season with bay leaf, cinnamon, kal paasi, fennel seeds, red chillies  and curry leaves. Then add onion and sauté till it turns to a golden colour, add ginger-garlic paste , sauté till the raw smell goes off, then add tomato, cook till the tomatoes get mashed well. Now transfer the contents from the pressure cooker , add red chilli powder and coriander powder, drumstick pieces and required salt, mix well and add water if required. Bring it to boil, then add tamarind extract. After it boils, add coconut paste. Bring it to one more boil and switch off. This is an excellent accompaniment for hot steamed rice, soft idly, dosa, parotta and chappathi.
Note:
  1. Keep in mind while adding salt in the sambar, that we have already added salt while pressure cooking the bone. So add salt accordingly.
  2. Those who don’t like to add coconut can exclude the coconut paste part in the recipe.
  3. The consistency will neither too thick nor too watery. It will be in medium consistency, so water should be added accordingly.
Tags: Elumbu Kuzhambu, Chettinad Bone Gravy, Chettinattu Elumbu Sambar, chettinad elumbu kuzhambu, chettinad lamb bone curry, Chettinad nenjelumbu kuzhambu, Markandam Kuzhambu, Nenju elumbu kuzhambu, Lamb chest rib bone curry, Nenju elumbu gravy
Read more ...

Saturday, August 10, 2013

Kalkandu Vadai


Kalkandu Vadai/ Sweet medhu vadai is one of the most delicious Chettinad recipe served in all Chettiyar marriages and they will make this recipe for all auspicious occasions like Diwali, Pillayar Nonbu, etc. Traditionally it was made with crystal sugar candy (Kalkandu) , hence the name “Kalkandu Vadai”. Now a days, sugar is substituted in place of kalkandu.

Very simple recipe with minimum ingredients and easy to prepare.


Ingredients:
  •  Urad dhal         - 1cup
  •  Raw rice          - 1 tbsp
  •  Kalkandu (crushed) – ¾ cup or                                                                                  Sugar               - ¾ cup
  •  Oil to fry

Method:
            Wash and soak urad dhal and raw rice for about 2 hours.  Grind  urad dhal without adding water because while adding sugar, the batter will become watery. After grinding urad dhal to fine batter, add sugar and grind well.
            Pour oil in a kadai , ensure that oil gets heated up to medium heat. Then take out the batter, flatten it like ulundu vada with hole at the centre and drop gently into the oil. Fry these vadais in slow fire till the bubbles subside. Take out the vadais  and serve it hot. The vadais will be good even when it is cold.
Note:
  1.    Care should be taken while adding water to grind urad dhal.
  2.    Vadais need to be fried in slow fire, otherwise it will turn into black.
Technorati Tags: Chettinad recipe, Authentic Chettinad Kalkandu Vadai recipe, Sweet vada, Chettinattu kalkandu vadai, chettinadu special kalkandu vadai, Kalkandu vada recipe, sweet medhu vadai
                        
Read more ...

French Beans Poriyal ( French Beans Stir Fry)

Poriyal/ Stir fry is a part and parcel of everyday South Indian meal since it is a great accompaniment for rice with any gravy.  It is very  easy to prepare provided the cut vegetables are in hand.

French Beans Poriyal will take hardly 5 minutes to cook. It should not be overcooked, else  colour,  flavour and sweetness of the vegetable will get spoiled .

While talking about the health benefits of French beans, it is rich in vitamins, anti oxidants, dietary fibre, minerals essential for body metabolism. Researchers say that it prevents colon cancer due to its fibre content and helps in preventing age related macular degeneration(vision problem) in elderly people since it has β-carotene. It helps in reducing absorption of cholesterol and  excellent vegetable for diabetic people. These beans are very low in calories, so people on diet may also take a good amount of this vegetable.


Ingredients:
  •   French Beans ( Chopped) – 1 cup
  •   Onion (finely chopped)             - 1 No.(small size)
  •   Green chilli (slitted)       - 1 No.
  •   Coconut (scraped)         - 1 tbsp
  •   Mustard                         - 1 tsp
  •   Urad dhal                       - 1 tsp
  •   Curry leaves                  - few
  •   Oil                                 - 1 tsp
  •   Salt as required
Method:
            Wash the beans thoroughly and chop the vegetable into small pieces. Transfer the beans in a kadai , cook the vegetable by sprinkling little water and salt by keeping the kadai closed with the lid for 3 to 5 mins. Check in between for water and if there is no water and the vegetable needs to get cooked still , sprinkle some more water and ensure the vegetable got cooked completely, remove from the stove. Place another kadai, pour oil, season with mustard, urad dhal, wait till it splutters, then add onion ,chilli, curry leaves. Sauté for few minutes till the onions become glossy, then add the cooked beans (without water), mix it well with all the seasoned items. Then add scraped coocnut, check for salt, mix everything evenly. Your beans poriyal is ready to serve with any rice.
Note:
  1. As I already told, don’t over cook the vegetable. Add sufficient water to cook the vegetable to retain the crunchiness, colour of the vegetable.
  2. The vitamins will  go away with water if you add more.
  3. Onion is optional, you can prepare it without onion also.
Read more ...